If you are a student who wants to put real AI into a college project, a hackathon entry or your placement portfolio, you do not need a paid GPU or a powerful laptop. Google Colab gives you a free notebook in the browser, and the open source Hugging Face Transformers library gives you thousands of trained models that you can load with a few lines of Python. This guide walks you through the exact steps: opening a notebook, installing the library, running six useful tasks with the pipeline API, understanding what happens under the hood, switching to a free GPU, and fixing the errors that almost every beginner hits.
Step 1: Open a Colab Notebook and Install Transformers
Go to Google Colab, sign in with your Google account, and click New notebook. You now have a Python environment running on a Google machine, not on your laptop. Each cell runs code, and you press Shift and Enter to execute it.
Colab usually ships with Transformers and PyTorch already installed, but it is good practice to install or upgrade explicitly so your notebook behaves the same way every time someone opens it. Run this in the first cell:
!pip install -q -U transformers sentencepiece
The ! tells Colab to run a shell command. The sentencepiece package is needed by some tokenizers, including the translation model we will use later. Then check that everything imports correctly:
import transformers, torch
print(transformers.__version__)
print("GPU available:", torch.cuda.is_available())
If the GPU line says False, that is fine for now.
Key takeaway: a free Colab notebook plus
pip install transformersis a complete AI lab. Nothing needs to be installed on your own machine.
Step 2: Your First Pipeline, Sentiment Analysis
The pipeline function is the easiest entry point into the library. You give it a task name and, ideally, a model id from the Hugging Face Hub. It downloads the model, prepares the tokenizer and returns a ready to use function.
from transformers import pipeline

sentiment = pipeline(
    "sentiment-analysis",
    model="distilbert-base-uncased-finetuned-sst-2-english"
)

reviews = [
    "The placement training sessions were really helpful.",
    "The hostel WiFi is terrible during exam week.",
]
print(sentiment(reviews))
You will get a list of dictionaries, each with a label such as POSITIVE or NEGATIVE and a score between 0 and 1. Always pass the model argument explicitly. If you leave it out, the library picks a default and prints a warning, and the default can change between versions, which makes your project harder to reproduce.
Step 3: Five More Tasks You Can Run Today
Once sentiment analysis works, the pattern is the same for every task: create a pipeline, call it on your input, read the output. Here are five more that are useful for student projects.
Summarization
summarizer = pipeline("summarization", model="facebook/bart-large-cnn")

article = """Indian engineering students increasingly build projects with
open source AI tools. Many start with notebooks in the browser, learn the
basics of Python and libraries such as Transformers, and then publish small
demos to show recruiters during internship and placement season."""

result = summarizer(article, max_length=60, min_length=20, do_sample=False)
print(result[0]["summary_text"])
This model is fairly large, so the first download takes a while.
Translation from English to Hindi
translator = pipeline("translation", model="Helsinki-NLP/opus-mt-en-hi")

text = "Please submit your internship report before Friday."
print(translator(text)[0]["translation_text"])
The Helsinki NLP Opus MT models are small and focused on one language pair each. Translation quality for Indian languages is decent for simple sentences but not perfect, so treat it as a starting point and review the output with a native speaker for anything important.
Zero shot classification
Zero shot classification lets you sort text into categories you define on the spot, without training anything.
classifier = pipeline("zero-shot-classification", model="facebook/bart-large-mnli")

query = "My laptop keeps shutting down while I run my final year project."
labels = ["hardware problem", "fees and payments", "exam schedule", "placements"]

result = classifier(query, candidate_labels=labels)
print(result["labels"][0], round(result["scores"][0], 3))
The output lists your labels sorted from most to least likely.
Question answering
qa = pipeline("question-answering", model="distilbert-base-cased-distilled-squad")

context = """The campus drive will be held on the main auditorium floor.
Students must carry two printed copies of their resume and a college ID card."""

answer = qa(question="What should students carry?", context=context)
print(answer["answer"], answer["score"])
This is extractive question answering: the model picks a span of text from the context you supply. It does not invent answers from outside knowledge, which makes it predictable and easy to explain in a viva.
Text generation with a small model
generator = pipeline("text-generation", model="distilgpt2")

prompt = "Three tips for preparing for a coding interview are"
output = generator(prompt, max_new_tokens=40, do_sample=True, temperature=0.8)
print(output[0]["generated_text"])
distilgpt2 is tiny and old, so the text will be rough. The goal here is to understand how generation works: a prompt goes in, tokens come out one at a time, and settings like temperature and max_new_tokens control the result. The assistants you already know, such as ChatGPT, Claude and Gemini, are far larger, but the basic idea of predicting the next token is the same.
Key takeaway: one function,
pipeline, covers classification, summarization, translation, question answering and generation. Learn the pattern once and reuse it everywhere.
Step 4: What Happens Under the Hood
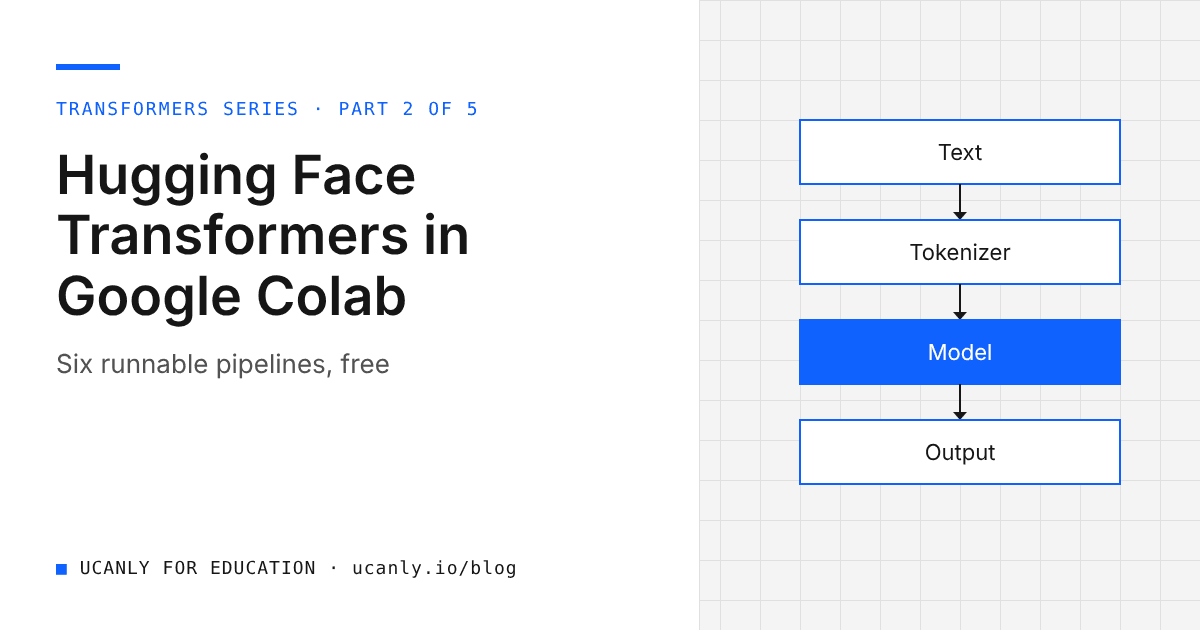
A pipeline performs three steps for you:
- Tokenization: the text is split into tokens and converted into numbers (input ids) plus an attention mask.
- Model forward pass: the transformer model processes those numbers and outputs raw scores called logits.
- Post processing: the logits are converted into something human readable, such as probabilities and label names.
You can do the same steps yourself with AutoTokenizer and AutoModelForSequenceClassification:
import torch
from transformers import AutoTokenizer, AutoModelForSequenceClassification

model_id = "distilbert-base-uncased-finetuned-sst-2-english"
tokenizer = AutoTokenizer.from_pretrained(model_id)
model = AutoModelForSequenceClassification.from_pretrained(model_id)

inputs = tokenizer(
    ["I cleared the technical round!", "The interview was a disaster."],
    padding=True, truncation=True, return_tensors="pt"
)
print(tokenizer.convert_ids_to_tokens(inputs["input_ids"][0]))

with torch.no_grad():
    logits = model(**inputs).logits

probs = torch.softmax(logits, dim=-1)
for row in probs:
    label_id = int(row.argmax())
    print(model.config.id2label[label_id], round(float(row[label_id]), 3))
Look carefully at the printed tokens. You will see special tokens like [CLS] and [SEP], and you may see longer words broken into subword pieces. The Auto classes read the model configuration from the Hub and load the correct architecture automatically, so the same code works for many different models. If you only want the hidden representations rather than classification scores, use AutoModel instead, which is the starting point for embeddings and custom heads.
Knowing these three steps is what separates someone who copied a notebook from someone who understands it. If you want a structured path from Python basics to building and fine tuning models, explore our courses.
Step 5: Switch the Runtime to a Free GPU
Small models run fine on CPU, but larger ones like facebook/bart-large-cnn are much faster on a GPU. In Colab:
- Open the Runtime menu and choose Change runtime type.
- Under hardware accelerator, select a GPU option and save.
- The runtime restarts, so run your install and import cells again.
Then tell the pipeline to use the GPU:
import torch
from transformers import pipeline

device = 0 if torch.cuda.is_available() else -1
summarizer = pipeline("summarization", model="facebook/bart-large-cnn", device=device)
Here device=0 means the first GPU and device=-1 means CPU. Free GPU access on Colab is not guaranteed: availability, session length and usage limits vary and change over time, so check the current limits on the Colab website. Disconnect the runtime when you finish so you do not waste your allowance.
Step 6: Common Errors and How to Fix Them
CUDA out of memory
This means the model, your inputs or both do not fit in GPU memory. Fixes, in order of effort:
- Process fewer inputs at once, for example by passing a smaller
batch_sizeto the pipeline call. - Shorten inputs with
truncation=Trueand a sensiblemax_length. - Use a smaller model, such as a distilled version.
- Wrap inference in
torch.no_grad()when you write manual code. - Restart the runtime from the Runtime menu to fully clear memory. Calling
torch.cuda.empty_cache()helps a little, but a restart is the reliable fix.
Slow first download
The first time you load a model, its weights are downloaded from the Hub and cached, usually under ~/.cache/huggingface. Later loads in the same session are fast. However, Colab sessions are temporary, so a new session downloads again. Pick smaller models while experimenting, load each model once at the top of the notebook instead of inside a loop, and be patient with large models on the first run.
CPU vs GPU device mismatch
A frequent error says that tensors were expected to be on the same device. This happens when your model is on the GPU but your inputs are still on the CPU, or the other way round. With manual code, move both explicitly:
device = "cuda" if torch.cuda.is_available() else "cpu"
model = model.to(device)
inputs = {k: v.to(device) for k, v in inputs.items()}
Also remember that switching the runtime type resets everything, so variables from the old session no longer exist. If you see a NameError after switching, simply rerun the cells from the top.
Key takeaway: most beginner errors come from memory, downloads or devices. Read the last line of the error message first; it usually names the exact problem.
Turning This Into a Portfolio Project
A notebook of pipelines is practice; a project solves a small, real problem. Ideas for freshers:
- A feedback analyser for your college events using sentiment analysis and zero shot classification.
- A notes summariser that condenses lecture transcripts for revision.
- A placement FAQ bot built on extractive question answering over your training and placement cell documents.
Write a clear README explaining the model you chose, why you chose it, its limitations and how you handled errors. Recruiters value that reasoning more than flashy demos. Add the project to your resume and run it through our AI resume review to describe it with strong, specific bullet points, then look for relevant roles on our jobs board.
What to Do Next
Open a fresh Colab notebook today and run every code block in this guide yourself, changing the inputs to sentences from your own college life. Then rewrite the sentiment example manually until you can explain each line. Switch to a GPU, run the summarizer, and deliberately trigger and fix a device error so it never surprises you again. Finally, pick one project idea, finish it in a week, and publish it with a good README. Small, complete, well explained projects built on free tools are one of the most practical ways to show employers that you can work with modern AI.